安装
debian 安装,其他版本以及更详细教程请看官网
apt-get install qbittorrent-nox
# 创建配置目录
mkdir /opt/qBittorrent
# 创建一个用户实现权限隔离
sudo useradd -r -s /usr/sbin/nologin qbtuser
# 给文件夹设置可访问权限
setfacl -m  d:u:username:rw /mnt/qBittorrent
# 查看文件夹权限
getfacl /mnt/qBittorrent
- useradd 命令详解
| -r | -s | /usr/sbin/nologin |
|---|---|---|
| 创建系统用户,即 UID 小于 1000 的用户 | 设置该用户的 shell 交互逻辑 | 此为该用户不允许访问交互式 shell |
- setfacl 命令详解
| -m | -R | d |
|---|---|---|
| 修改 acl 访问权限 | 递归设置 | 设置默认权限,这意味着新创建的子文件夹也会继承父文件夹的权限 |
设置守护进程
# 创建系统服务
cat  > /etc/systemd/system/qbittorrent.service << EOF
[Unit]
Description=qBittorrent-nox service
Documentation=man:qbittorrent-nox(1)
Wants=network-online.target
After=network-online.target nss-lookup.target

[Service]
# if you have systemd < 240 (Ubuntu 18.10 and earlier, for example), you probably want to use Type=simple instead
Type=exec
# change user as needed
User=qbtuser
# The -d flag should not be used in this setup
ExecStart=/usr/bin/qbittorrent-nox --profile=/opt --webui-port=8081
# uncomment this for versions of qBittorrent < 4.2.0 to set the maximum number of open files to unlimited
#LimitNOFILE=infinity
# uncomment this to use "Network interface" and/or "Optional IP address to bind to" options
# without this binding will fail and qBittorrent's traffic will go through the default route
# AmbientCapabilities=CAP_NET_RAW

[Install]
WantedBy=multi-user.target
EOF
启动 qbittorrent
systemdctl daemon-reload
systemdctl enable qbittorrent
systemdctl start qbittorrent
之后浏览器访问 http://ip:8081 端口,输入账户 admin,密码 adminadmin 即可
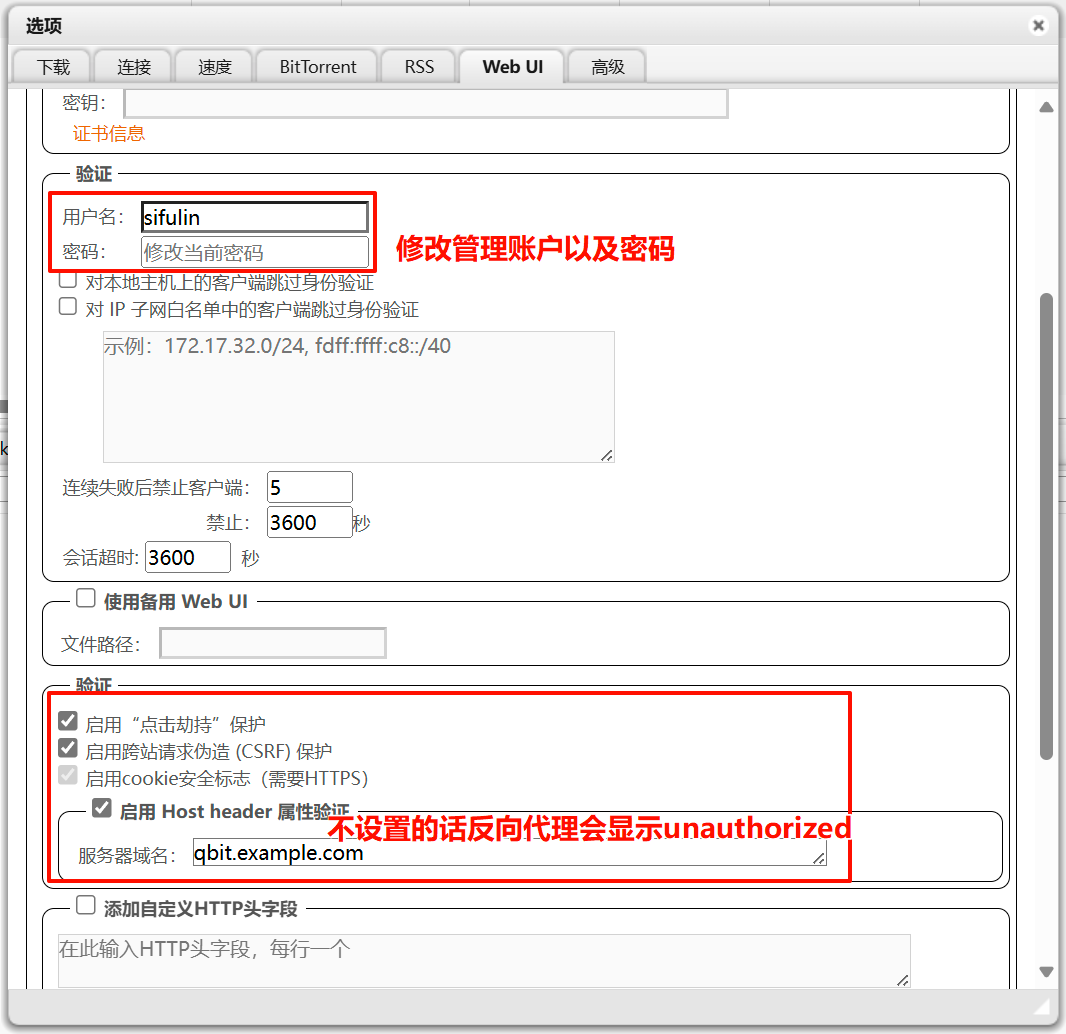
修改账户密码以及语言
如果需要配置反向代理请按图中操作
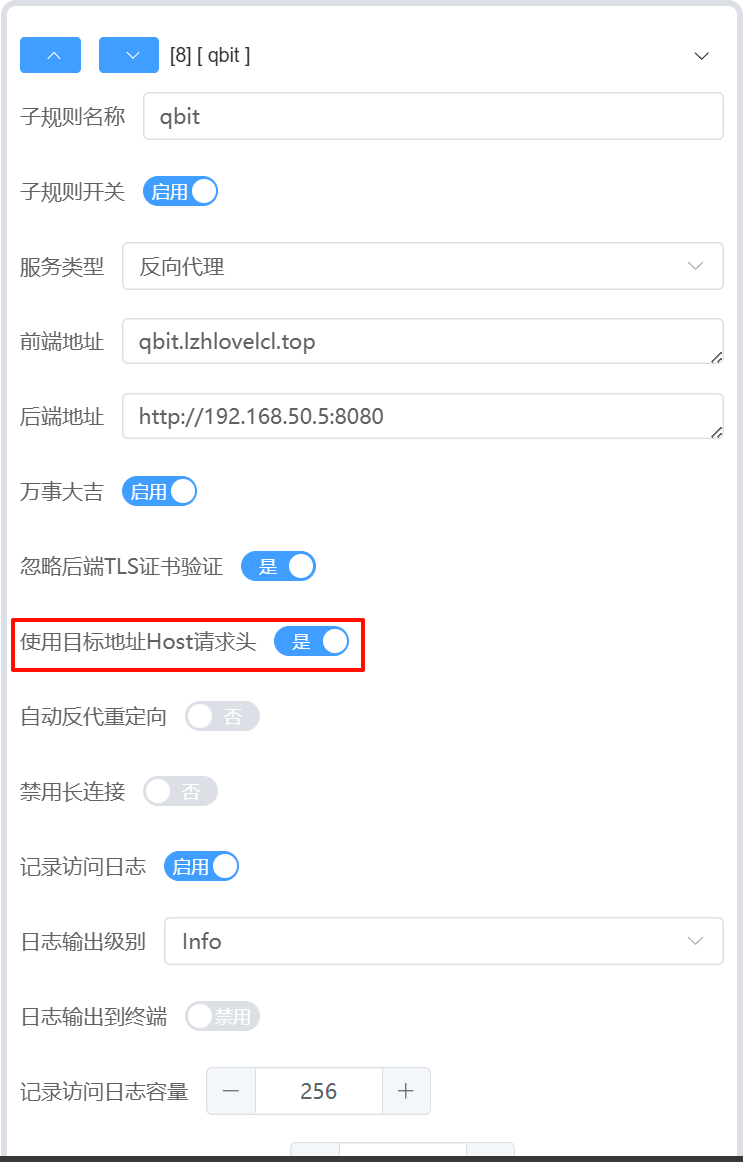
配置反向代理请求头需要设置 HOST,在 lucky 中如下操作
注意事项
如果需要在不同的文件夹下载保存数据,记得设置用户权限,否则会下载失败的